DIY Phone Holder
Hi !
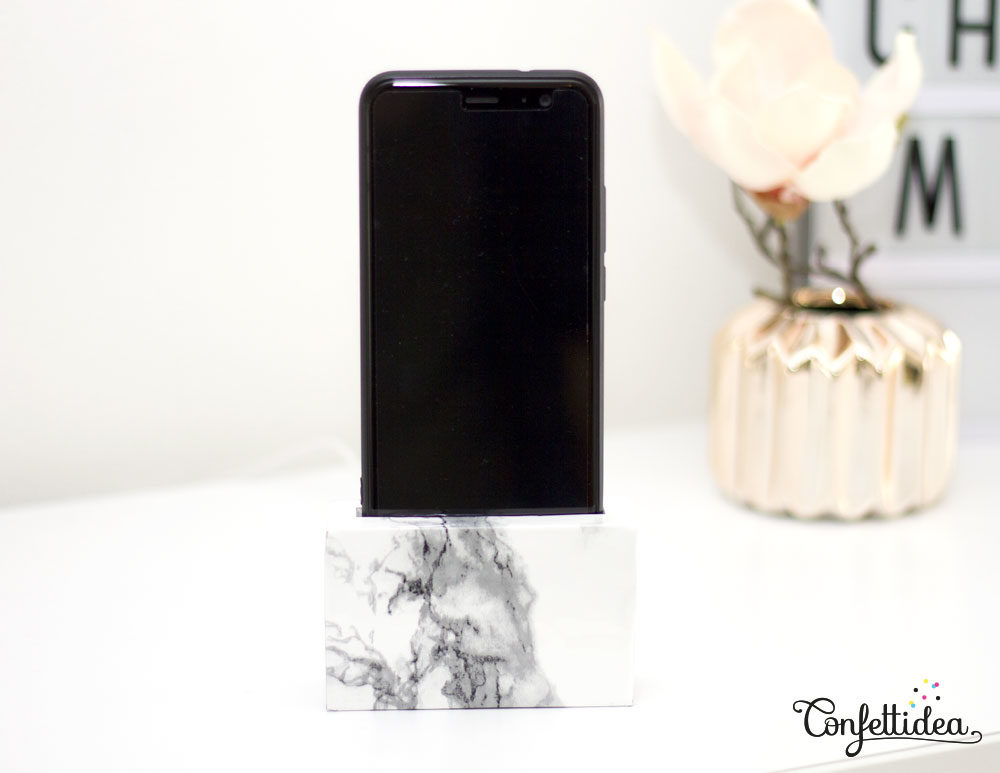
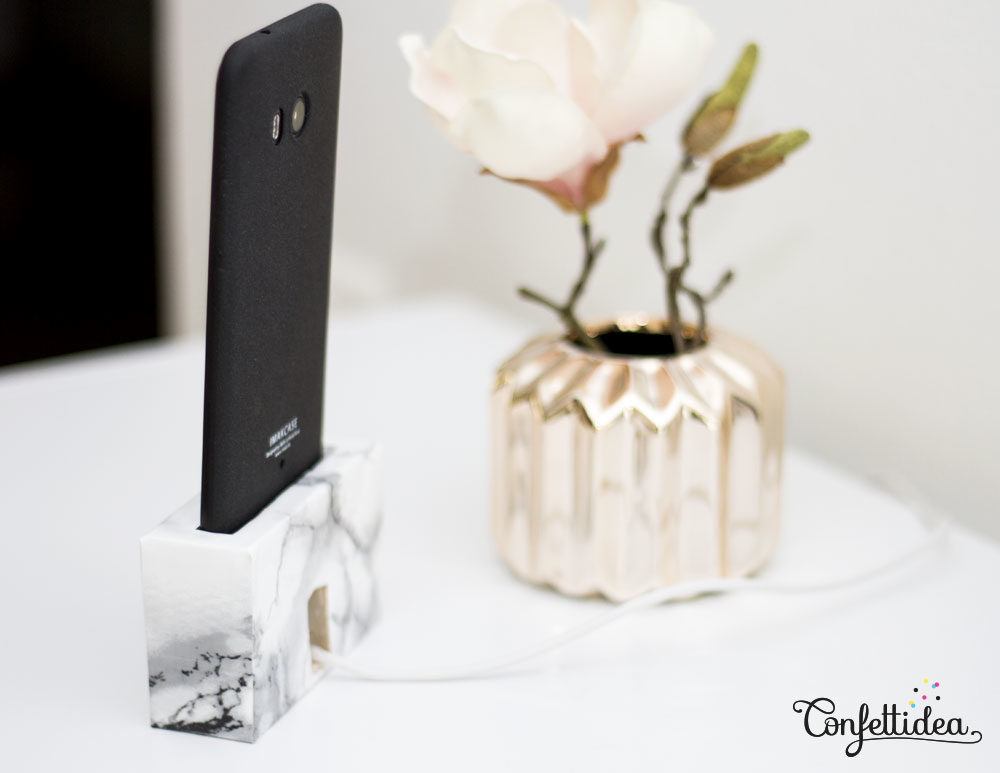
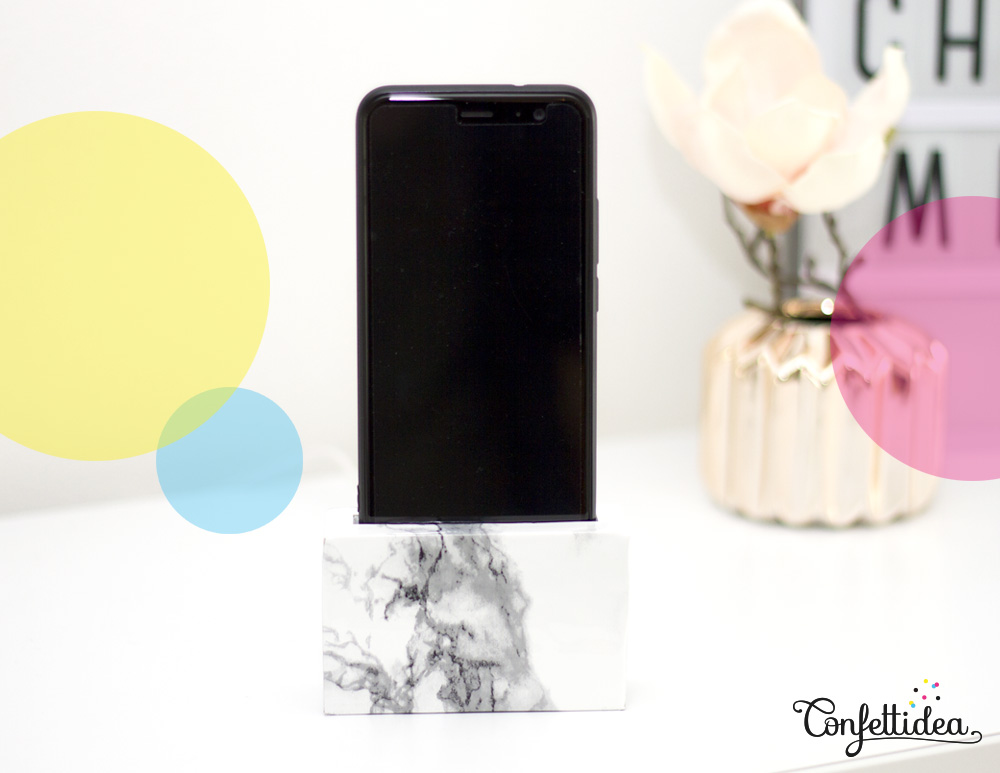
I’m proud to present you my latest personal project: a DIY phone holder.
It does not matter if your phone is an iPhone, HTC or Samsung (or other …), you can realize this phone holder !
One day I said to myself: “It’s not super practical (and pretty) these cables that hang around all the time on our furniture where we charge our phones”. So I did a little research on the web and I found a phone holder to do yourself in card stock. But that’s not really the solution I was looking for because I wanted something that could resist for years. Then I found some phone holder already done. Which is not what I wanted. I wanted something homemade. So I thought how could I easily make a phone holder that is strong enough ?
PS: I try to write in english but it isn’t my mother tongue. Sorry if you find some mistakes.
After a few tests, I managed a solution by cutting balsa wood in 1 cm thickness. We can cut this wood using a simple exacto knife so my idea don’t require a special equipment like a saw or other.
The good news is that everyone can make this amazing phone holder.
In addition, you can give it a personalized final touch by choosing your own sticker paper to cover your beautiful phone holder.
Before you start,
After printing the templates, measure the base of your phone (where the charging socket is located). In the templates to print, I have prepared examples for phones of different sizes: 7.2 cm, 7.6 cm or 8 cm. If none of these measures match your phone, take the one that comes closest to it but it must be bigger than your phone (otherwise your phone will not fit on the phone holder).
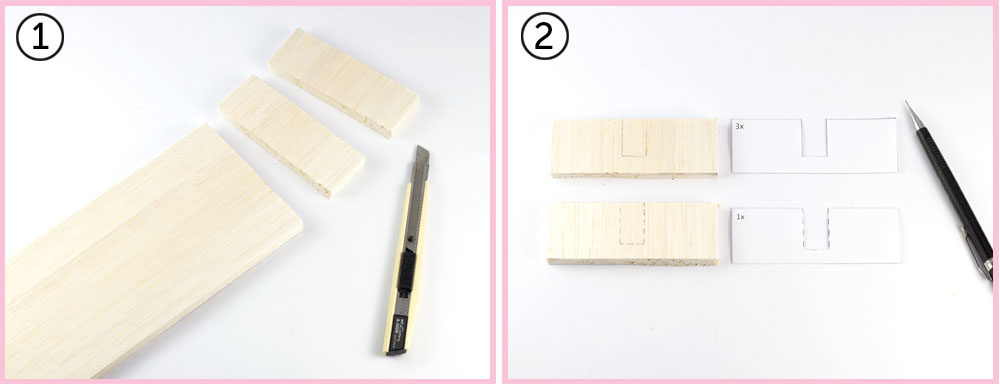
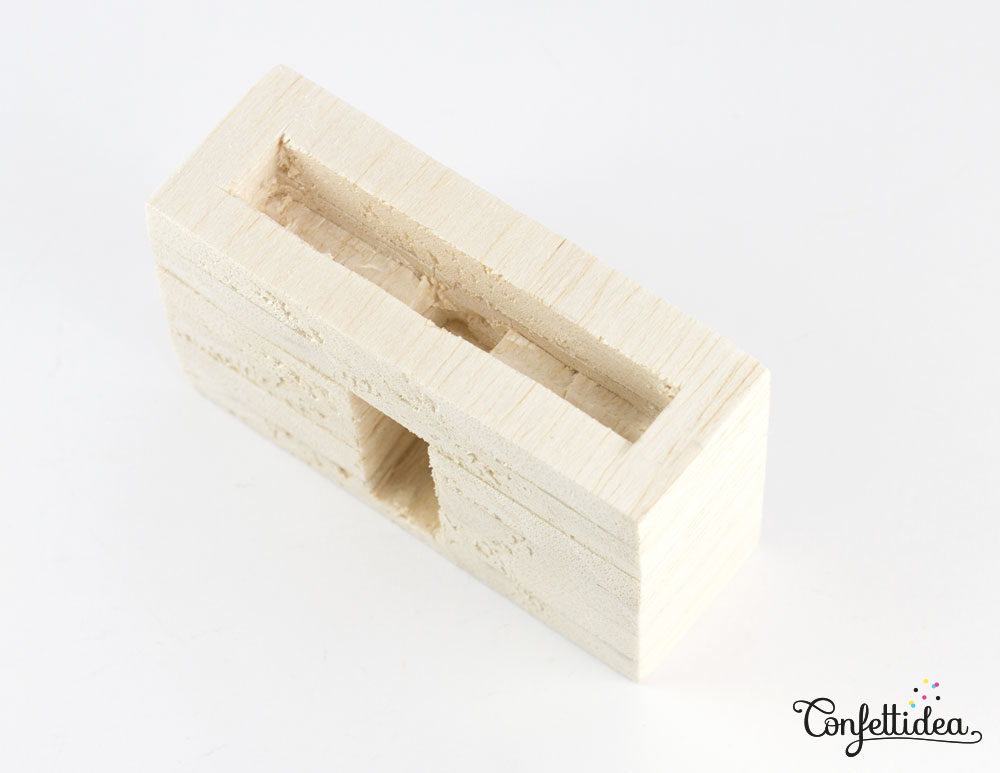
- I have here a balsa wood of 10 cm wide. I measure 3.5 cm high and cut slices. We must cut 6 slices in all.
- Draw on the wood the cutouts according to the printed template.
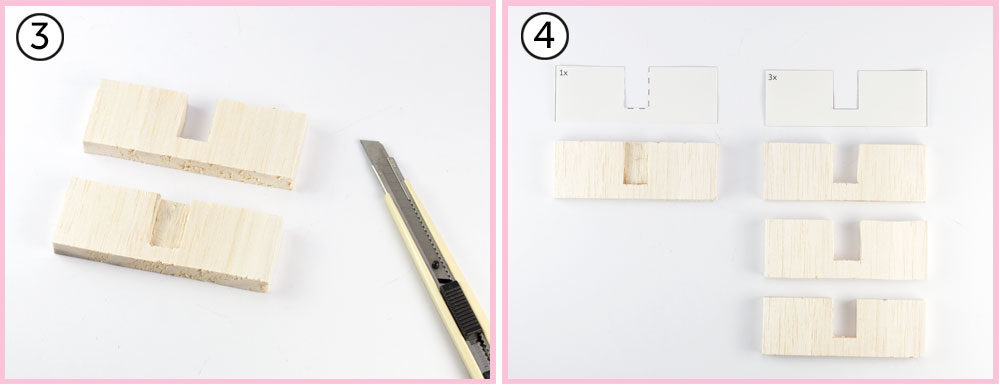
- Cut out completely 3x the shape in the wood. And cut 1x to mid-height.
- Here are the parts you should get.
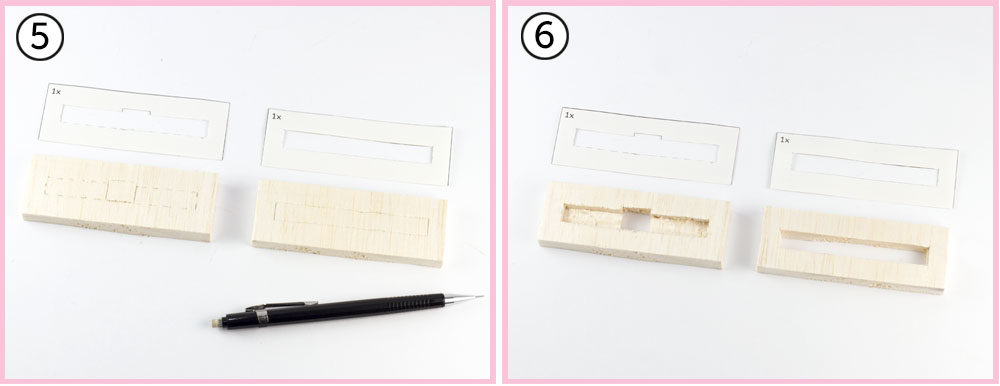
- Now draw the last two shapes (each one once).
- Here is the result of the cut (pay attention to the mid-height cut).
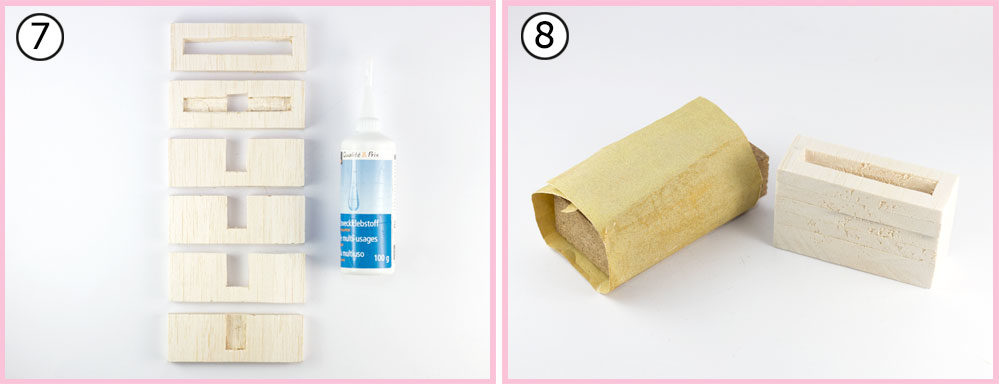
- Here are the 6 parts of wood ready to be assembled in the order of this photo above. Glue the pieces together with white glue (wood glue).
- Once the glue dried, gently sand down your support to remove small imperfections and make a smooth surface.
Here is how it is seen from above.
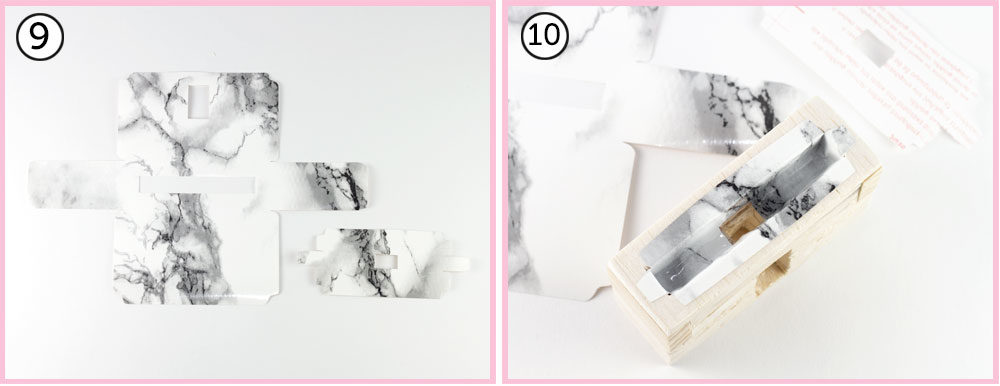
- Now use the template that will be used to cover your phone holder. Warning !!! Choose the right model according to the size of the base of your phone that must be the same size that you used to create your phone holder (7.2 cm, 7.6 cm or 8 cm) !!!
And this is where you will be able to customize your phone holder 🙂 Cut the shape of the template in a self-adhesive paper (and laminated) of your choice. - Start by sticking the smallest shape that will go in the slot of your phone holder.
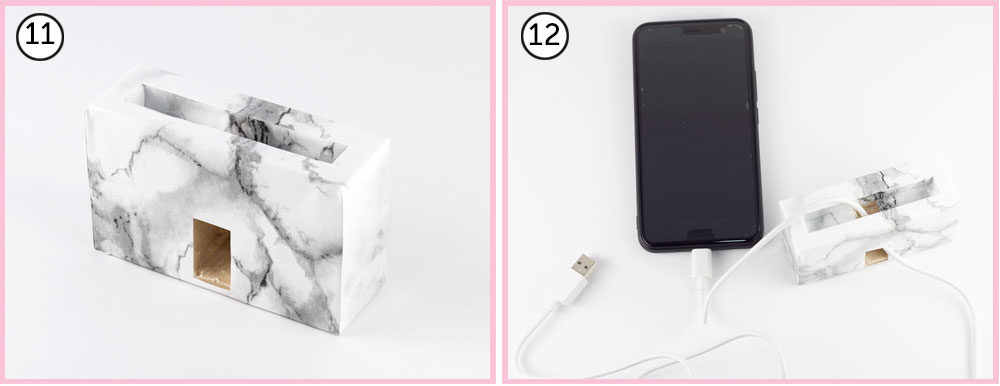
- Then stick the big shape that will cover the whole of your phone holder.
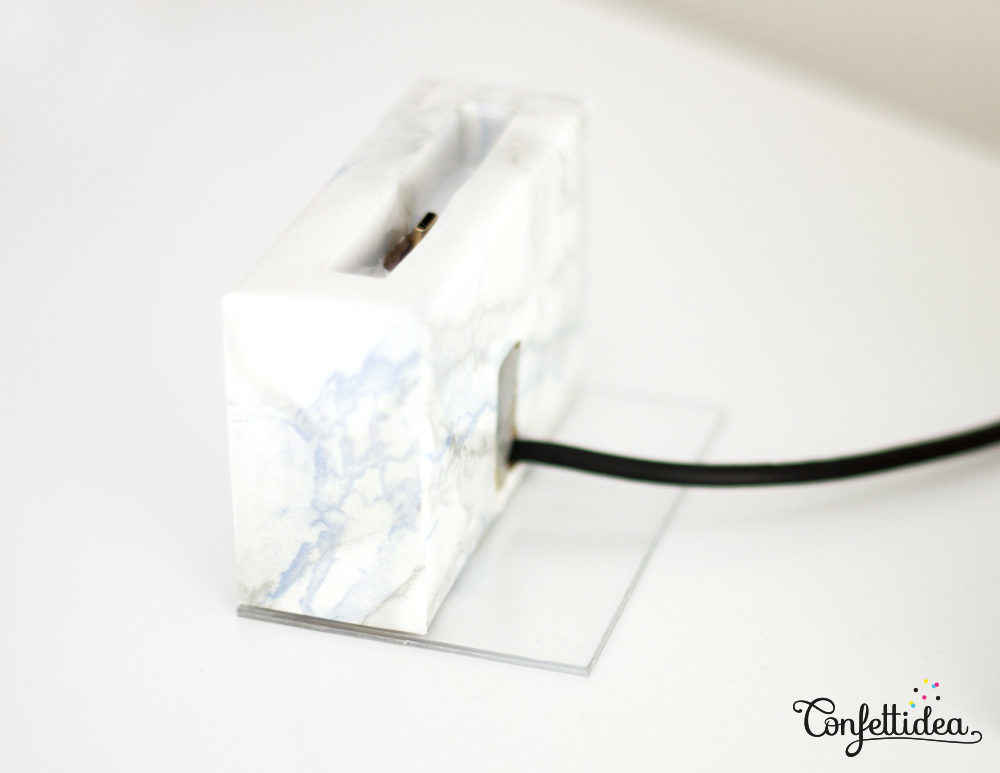
- Pass the cable of your charger through the holder as in the picture above.
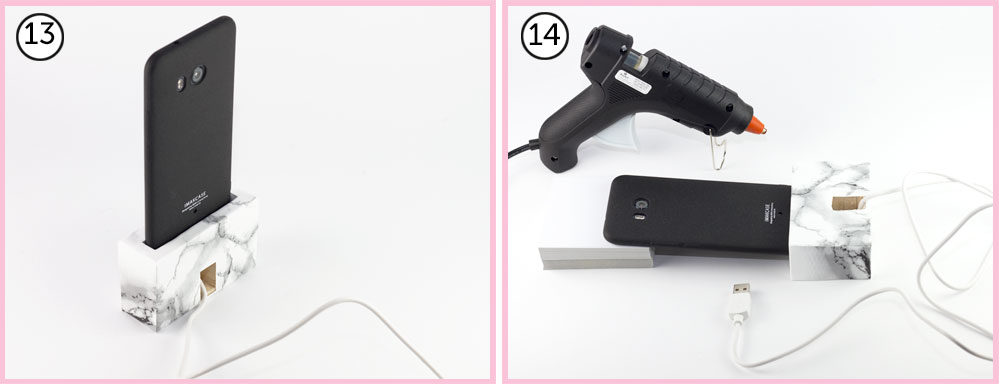
- Place your phone on the phone holder (always with the cable connected to the phone).
- Keeping this position, put the phone holder down with the phone in place so you can stick the cable in place. I put papers under my phone so that it fits in the angle I wanted. Then gently fill the hole through which the cable comes out with hot glue. Warning !!! Start by putting a little bit of hot glue so that the cable does not move and wait for it to cool down. If the cable does not move, you can remove the phone and then add more glue to completely fill the cavity. Also be careful that the glue does not sneak towards the end of the charger otherwise it can ruin it. Or it can also cause a bump in the place where the phone should go and then you wouldn’t be able to put your phone in place.
And if your phone is too heavy for your phone holder and it falls back (which should not happen but just in case…), you can add a small thin plate of plexiglass under the phone holder , as seen in the picture below: